Tuesday, October 29, 2013

Successful Droplets with Adobe Photoshop CS5

Creating Droplets Is Easy...Right?

Wrong! You would think so by the way many web authors talk about it, but let's be honest: how many of us use this feature on Photoshop consistently? This guide will help you understand the process, the results, and the major hang-ups that come with creating a batch Droplet in Adobe Photoshop. 


Step 1: All Hale the Droplet

So what is a Droplet exactly? A Droplet is a mini-program, written by Photoshop that allows you to drag-and-drop photo files so you can quickly and effectively edit pictures. Why does this matter? Think back to that last family vacation where you took a veritable...ton of photos. Remember having to sit down and go through each and every photo and edit it to look really nice? Using a Droplet, you can select all of your photos from their original folder, drag them over to where you have your Droplet app and release. The Droplet takes a pre-loaded set of instructions in Photoshop and automatically does it to your photos. The Droplet then deposits your photos in whatever folder you want, and VOILA! You have all of your photos looking beautiful in time for Aunt Myrtle to come over and take a look. Still confused? Keep reading...

Step 2: Prep Work
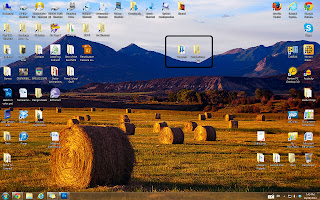
This is a quick step, but it makes the difference. You need to make two folders one entitled "Droplets" where you will keep the Droplets you create (mine is on my Desktop for ease of use, but you can put yours anywhere) and another folder where your finished files will go.


Step 3: Make an Action

Photoshop is a great piece of software for any photographer from newbie to pro, you just have to know how to use all the cool gagdets and wing-dingers. In order to set up your Droplet you first need to make an Action that it can use. Actions are a super handy way to save time for anything you might find yourself doing over and over and over and over and over and...you get the point.


Open up Photoshop.

Open any picture.
Go to Window>Actions, or just hit Alt+F9 on your keyboard

This brings up the Actions panel on the right of your screen.


Under the Actions window, find Record and push it


Change your Picture Settings as you would like

Go to File> Save As... or press Ctrl+Shift+S on the Keyboard
         This is important to add into your Actions, if you don't you'll have some issues later on.
Under the Actions window, press Stop


Step 4: Set up your Droplet

Now that you have an Action to use, you can make your Droplet

Go to File>Automate>Create Droplet...

Choose the 1st folder you made earlier in
Step 2
Choose a name for the Droplet that helps you remember what it does (mine is for re-sizing)


Choose the Action you want the Droplet to do from the drop-down menu

Choose "Folder" for destination
Choose the 2nd folder you made in Step 2 


Click the "Override Save as..." button


Click OK

Exit Photoshop


Step 5: Test It!

Now you can choose a photo you want to test this with.

Click and drag it over to the .exe you made in your 1st folder from Step 2

Wait for Photoshop to open and finish the command

Check in the 2nd Folder you made in Step 2 to to ensure the picture is what you want

Celebrate Victory

Okay that's it.  Hopefully at this point you have a fully-functioning, time-saving Droplet. 

Wednesday, August 28, 2013

Fixing a Broken Sandal


          So your favorite pair of summer-time shoes just ripped, huh? Well, as long as you have access to a few simple supplies, you can stop cussing and start fixing. Keep in mind that although this technique might work on cheaper flip-flops, it was intended for nicer sandals you don't want to just throw away. Total time Spent: 10 minutes

 Step 1: Find some supplies

  •      Hemp, or some other thin, strong material.
  •      A center punch, or a small screw driver
  •      A sharp razor blade, or a knife with a good point
  •      Super glue or other adhesive
  •      A drill and 3/8 inch drill bit 


 Step 2: Make your holes

     In this step you will need to make two holes, one through which your original strap went, and another one for a new strap. I used a 3-8 inch drill bit here because it was easy and quick

Step 3: Connect the holes under the sandal

     Flip the sandal over and using the razor blade carve out a V-shaped notch between the two holes, making sure not to go too deep.This gives an area for the repair knot to go where it will be protected from the normal wear-and-tear of walking.
Step 4: Secure the new strap material to the existing strap

     I looped the hemp through the old strap by way of a new hole. Make sure you have doubled the hemp so you have a loop to go through the hole on the sandal for the next step.

 Step 5: Push new strap loop through bottom of Sandal

     Using the first hole you made, where the existing strap used to go, push the new strap loops through using your punch. Remember not to pull the whole strap through, otherwise you won't have the loop you need for the next step.

 Step 6: Push loose end of new strap through second hole

     From the top of the sandal, push the loose end of the new strap through the second hole you made. Again, this should be two strands of material.
Tightened chain knot 
  Step 7: Thread loose end through first loop and push loose ends back up through second hole

     The loose ends will go through the loop you made in Step 5, and then pushed back up into the second hole. The loose ends should look like the picture to the right from the top when done.  Make sure to tighten these chain knots now so you are ready to finish the project in the next steps. P.S. Make sure not to make your new strap too short, this can lead to an uncomfortable fit!

  Step 8: Wrapping up the loose ends
     Wrap the loose ends around the existing thong strap, then tie using a square knot. Cut excess off. Apply glue to bottom chain knot, and top square knot and second hole
 Step 9: Put it on!

     Now your sandal should be back to ship-shape, and you can go merrily on your way.


Saturday, February 23, 2013

Weirdness from Bananas...

       I must preface this new post with the fact that I love s'mores. It is literally my favorite dessert item of all time. That being said, I do not like the flavor of s'mores with bananas. "Bananas?" you might ask. Yes, bananas. I made the terrible decision to leave all of my s'more making supplies over a fresh bunch of bananas which was all well and good until those bananas weren't so fresh. What happened next? I started eating my delicious  looking s'mores and...they tasted like bananas. Weird. But this did get me thinking: for all of the "power"of ripe bananas to infuse surrounding objects with both their odor and flavor, how do big companies make banana flavored items? I mean, is it all chemicals at this point? I would think you could save a lot of money and be organically minded if you just put your food you wanted flavored near a gross pile of bananas for about a week. Big companies out there, I will be expected royalties from the utilization of my new technique which shall be henceforth dubbed "Banana tastesmellification". That or "Banana a la Lamoreaux". Get back to me on that.