Creating Droplets Is Easy...Right?
Wrong! You would think so by the way many web authors talk about it, but let's be honest: how many of us use this feature on Photoshop consistently? This guide will help you understand the process, the results, and the major hang-ups that come with creating a batch Droplet in Adobe Photoshop.
Step 1: All Hale the Droplet
So what is a Droplet exactly? A Droplet is a mini-program, written by Photoshop that allows you to drag-and-drop photo files so you can quickly and effectively edit pictures. Why does this matter? Think back to that last family vacation where you took a veritable...ton of photos. Remember having to sit down and go through each and every photo and edit it to look really nice? Using a Droplet, you can select all of your photos from their original folder, drag them over to where you have your Droplet app and release. The Droplet takes a pre-loaded set of instructions in Photoshop and automatically does it to your photos. The Droplet then deposits your photos in whatever folder you want, and VOILA! You have all of your photos looking beautiful in time for Aunt Myrtle to come over and take a look. Still confused? Keep reading...
Step 2: Prep Work
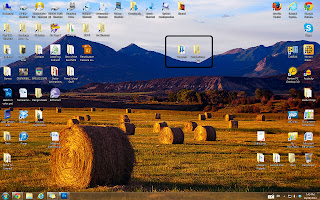
 This is a quick step, but it makes the difference. You need to make two folders one entitled "Droplets" where you will keep the Droplets you create (mine is on my Desktop for ease of use, but you can put yours anywhere) and another folder where your finished files will go.
Step 3: Make an Action
Photoshop is a great piece of software for any photographer from newbie to pro, you just have to know how to use all the cool gagdets and wing-dingers. In order to set up your Droplet you first need to make an Action that it can use. Actions are a super handy way to save time for anything you might find yourself doing over and over and over and over and over and...you get the point.Open up Photoshop.
Open any picture.
Go to Window>Actions, or just hit Alt+F9 on your keyboard
This brings up the Actions panel on the right of your screen.
Under the Actions window, find Record and push it
Change your Picture Settings as you would like
This is important to add into your Actions, if you don't you'll have some issues later on.
Under the Actions window, press Stop
Step 4: Set up your Droplet
Now that you have an Action to use, you can make your Droplet
Choose the 1st folder you made earlier in
Step 2
Choose a name for the Droplet that helps you remember what it does (mine is for re-sizing)
Choose the Action you want the Droplet to do from the drop-down menu
Choose "Folder" for destination
Choose the 2nd folder you made in Step 2 Click the "Override Save as..." button
Click OK
Exit Photoshop
Step 5: Test It!
Now you can choose a photo you want to test this with.
Click and drag it over to the .exe you made in your 1st folder from Step 2
Wait for Photoshop to open and finish the command
Check in the 2nd Folder you made in Step 2 to to ensure the picture is what you want
Celebrate Victory
Click and drag it over to the .exe you made in your 1st folder from Step 2
Wait for Photoshop to open and finish the command
Check in the 2nd Folder you made in Step 2 to to ensure the picture is what you want
Celebrate Victory


